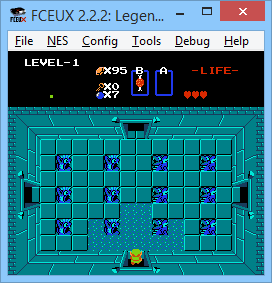
The Zelda Extreme Challenge is simple to understand, as it's essentially a low-percent swordless run with a few added restrictions.
- You can never collect the wooden sword, white sword, or magical sword
- You cannot collect any heart containers
- You cannot collect either boomerang, the blue candle, either potion, the letter, either ring, the magic key, the book of magic, the power bracelet, or the magic shield (all items that are not needed to complete the game)
- You must collect bombs, the arrow, the silver arrow, the bow, the red candle, the recorder, the bait, the magic wand, the stepladder, the raft, and both bomb upgrades
- You may not ever kill any overworld enemies, or allow them to die accidentally
- You must collect the map and compass in all nine labyrinths
- You must visit every screen of all nine labyrinths
So, let's get this challenge started.
I figured that this would be a fun challenge to start. Up above, you can see my death-filled second quest three heart challenge file. I don't know if I'll ever bother going back to that one.
First thing to do is to collect the 100 rupee secret up in the north-eastern most screen. I probably should have gotten the 30 and 10 rupee secrets under the nearby Armos, but didn't think of it at the time.
Usually when playing, the Up+A save trick always feels dirty to me, like cheating... I'm willing to stomach it for this challenge though.
Next order of business was heading east to buy bombs from the shop on the coast. I would have liked to buy the arrow here too, but couldn't afford to play the Money Making Game afterwards if I had. I also should have bought a second pack of bombs, but didn't think of that either at the time.
Our first 'offensive' action in the game, blowing open the Money Making Game west of the starting screen. Fortunately, we manage to spare the lives of all four Tektites.
About ten minutes later (and with a lot of Up+A save scumming), we manage to max out our rupee count. Now we're off to buy some essentials for our quest.
We pick up the arrow and more bombs from a shop a few screens west of level one, and then some bait from the secret shop under the Armos statue.
I can't believe that I'm actually using the bait item for more than just bribing the hungry Molblin. Since the Octoroks swarm to it, I can run past them safely without fighting them, and something tells me this will be a regular occurrence for me in this challenge.
Nothing in the rules against using the glitch to unlock the first door in the Eagle Labyrinth...
I waste a bomb in this room before I manage to kill the Stalfos with the key.
Quick detour into the compass room (and to get hit by a Keese). After this, we blow our way up towards the bow to save a key, using the bait to sneak past the Goriya up there.
We finally have a weapon now! Well, other than the bombs, which I imagine will be in very limited supply this challenge. I should actually be counting kills to force bomb drops...
It pains me to waste arrows killing these Gels, but the rules say I have to access that worthless room to the left...
We could debate as to whether or not this quote refers to the Triforce Shard at the east part of this level, or if it refers to the hidden 100 rupee secret in the northeast corner of the map, but I think it's more likely the latter. I mean, if you look at the map that came in the NES manual, you can see that that part of the world is actually a peninsula.
We accidentally waste a bomb in a room full of Keese and waste a key on a door we could have bombed past. At the time I wasn't thinking about how important keys would be since you can earn more than enough to finish the game if you play smart, or use the magic key. But since we need to visit every room in every level, we'll need all the keys we can get. I might have to shell out to buy a key in a shop to make up for this mistake.
Hide in the corner while you bomb Aquamentus to avoid the heart container he drops. We don't want to do this work all over again...
It took us more bombs and keys than I would like, but we've managed to visit every room in the Eagle and collected its treasures without grabbing the boomerang. Thankfully we'll never have to visit here again!
Let's hope we can be so lucky collecting the next Triforce Shard...


No comments:
Post a Comment